Markers
A marker is a small graphic that a path draws at its nodes — an arrowhead at the end, dots at every node, a decoration at the start. Markers are defined once and referenced by any number of paths, so a diagram with fifty arrows stores one arrowhead.
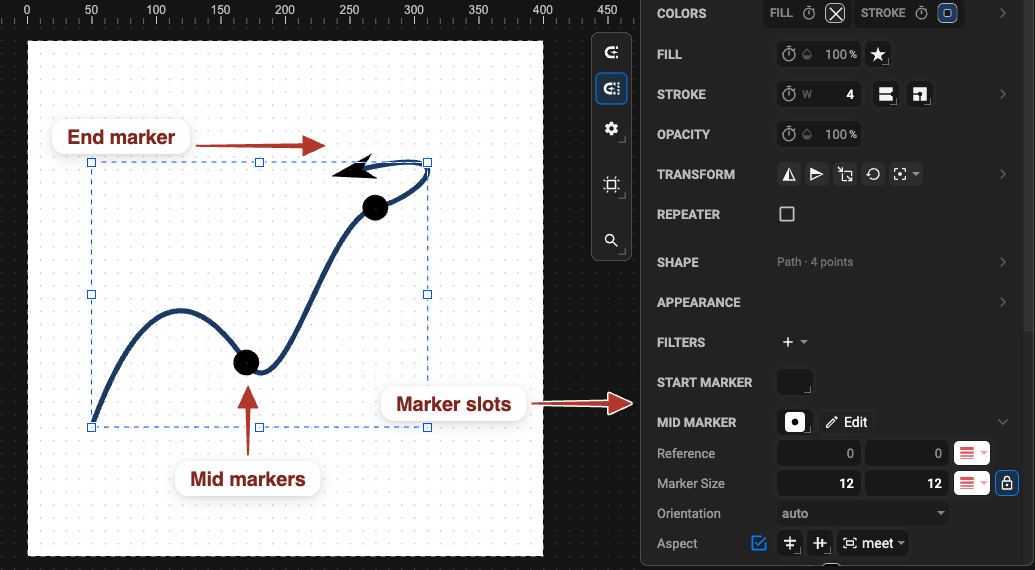
Three positions, each with its own marker (or the same one for all):
| Position | Where it appears |
|---|---|
| Start Marker | at the first node |
| Mid Marker | at every node in between — add nodes and you get more |
| End Marker | at the last node |
Markers follow the path direction; if an arrow points the wrong way, use Path › Reverse Path.
Create a Marker
Section titled “Create a Marker”- Draw the marker shape (an arrowhead, a dot, …) and select it.
- Choose Object › Make Marker, or click Make Marker in the toolbar.
The shape leaves the canvas and appears in the Markers section of the Objects panel, labelled Unused until a path uses it.
Apply a Marker to a Path
Section titled “Apply a Marker to a Path”- Select a path. (Markers only work on paths — convert shapes first with Path › Object to Path.)
- In the Properties panel, open the Start / Mid / End Marker dropdowns and pick a marker — one of yours, or Add from Library for the built-in set.
If the dropdowns are missing, switch on the Marker section in the sections bar.
Edit a Marker
Section titled “Edit a Marker”Double-click the marker’s thumbnail in the Markers section to enter Marker View, edit it like
any artwork, then click the … row at the top of the Object Tree to return. Every path using
the marker updates.
To make a variation, select the marker in the Markers section and copy / paste it — the copy appears as a new, unused marker.
Delete Unused Markers
Section titled “Delete Unused Markers”Click the bin icon next to an Unused marker in the Markers section. A marker still used by a path cannot be deleted until it is removed from that path (set the dropdown back to none).
Markers and the Saved File
Section titled “Markers and the Saved File”Markers are native SVG (<marker> + marker-start / mid / end) and are kept in SVG and JSON
output. Lottie has no markers — see SVG ↔ Lottie support.