Draw on Canvas
Everything starts with a shape. Pick a tool in the Tools panel (or press its key), drag on the canvas, and refine the result in the Properties panel. All shapes are vectors — resize them as much as you like, they stay sharp.
| Shape | Tool | Key |
|---|---|---|
| Rectangle, square | Rectangle | R |
| Ellipse, circle | Ellipse | E |
| Any line or curve | Pen | P |
| Hand-drawn curve | Freehand | F |
| Star, polygon, spiral | Shape | W |
| Text | Text | Shift + T |
While dragging any shape tool: Shift constrains proportions (square, circle, 30° steps), Alt / Option draws from the centre. The tools themselves are described in Tools and toolbar.
Rectangles
Section titled “Rectangles”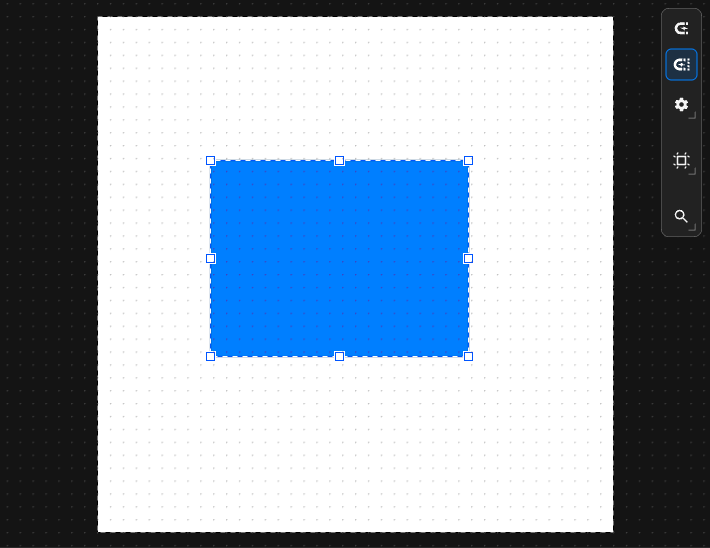
Press R, then click and drag on the canvas.
- Shift — a perfect square.
- Alt / Option — draw from the centre point where you started dragging.
- Both together — a square growing from the centre.
After drawing, the Shape section of the Properties panel shows the size and the corner radius (see Round corners); the Transform section shows position, rotation and scale.
Ellipses
Section titled “Ellipses”Press E, then click and drag.
- Shift — a perfect circle.
- Alt / Option — draw from the centre.
The Shape section shows the ellipse size; the radii follow from it.
Groups
Section titled “Groups”A group makes several objects behave as one: move, transform, animate or colour them together, and keep the Object Tree tidy.
- Group — select the objects and choose Object › Group (
⌘ / Ctrl + G). - Ungroup — select the group and choose Object › Ungroup (
⇧ ⌘ / Ctrl + Shift + G).
Double-click a group on the canvas to work inside it; hold ⌘ / Ctrl and click to grab one object inside a group without entering it. Groups can be nested, and a group is also the starting point for the Repeater and Spray tools.
Tip: set a fill on the group and leave the shapes inside on Unset colour — all of them follow the group’s colour. See Unset colour.
Bezier Paths
Section titled “Bezier Paths”Custom shapes are paths: nodes (points) joined by straight or curved segments. The Pen
tool (P) draws them; the Node tool (N) edits them afterwards.
Drawing
Section titled “Drawing”- Press
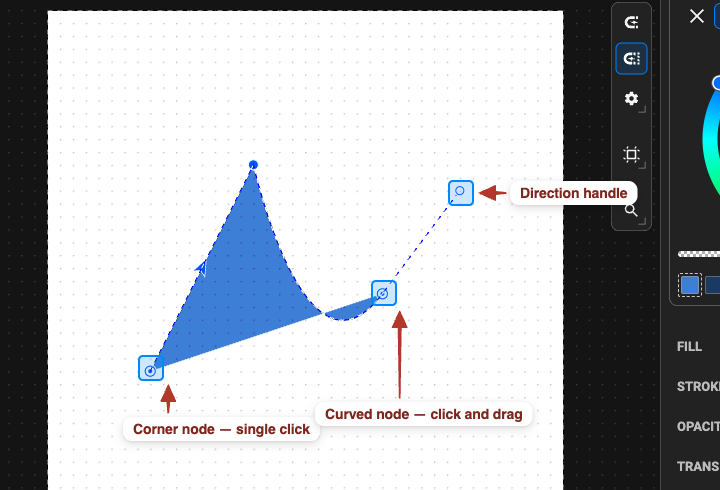
Pand click on the canvas: the first node. - Click again for a corner node — a straight segment.
- Click and drag for a curved node — the drag direction sets the curve’s angle, the drag distance its strength; the node gets two handles.
- Finish with a double-click, or press Escape. To close the shape, click its first node.
Hold Shift while placing nodes or dragging handles to snap to 90° angles.
Connecting paths
Section titled “Connecting paths”The Pen tool also joins open paths:
- Close a single open path — click one open end node, then the other.
- Join two paths into one — select both paths, pick the Pen, click the open end of the first path, then the open end of the second. A new segment connects them.
Freehand
Section titled “Freehand”Press F and draw with the mouse; the stroke is converted into a smooth bezier path you can edit
with the Node tool. Good for organic shapes and quick sketches.
Round Corners
Section titled “Round Corners”Two ways to round corners:
Corner radius in the Properties panel — for rectangles, the Shape section has a Corner Radius with a lock: locked, the horizontal and vertical radius change together; unlocked, you set them independently.
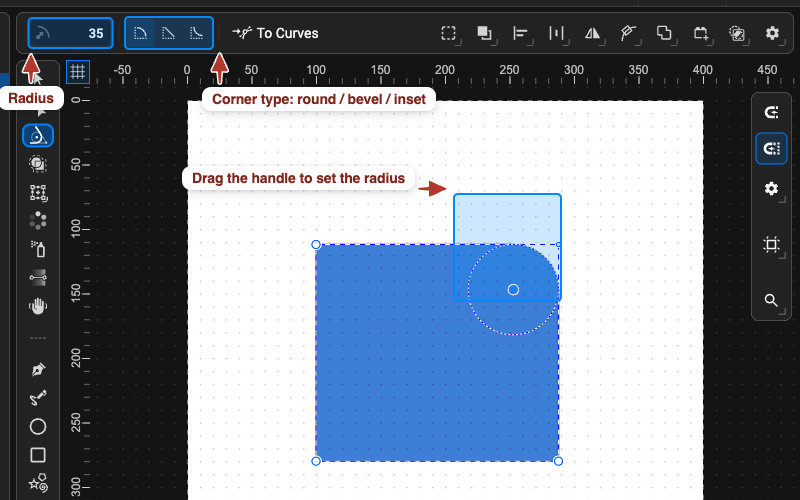
Round Corner tool (C) — rounds individual corners of any shape:
- Select the shape and press
C. Every corner gets a handle. - Click a corner (Shift + click to pick several) and drag the handle, or type the Corner Radius in the toolbar.
- Choose the Corner Type in the toolbar: Round (circular), Bevel (straight cut) or Inverted Round (concave).
The toolbar’s Convert to Curves turns the result into an editable path. Copying a radius value from the toolbar field and pasting it with other corners selected applies the same value to them.
Shape Presets (Stars, Polygons, Spirals)
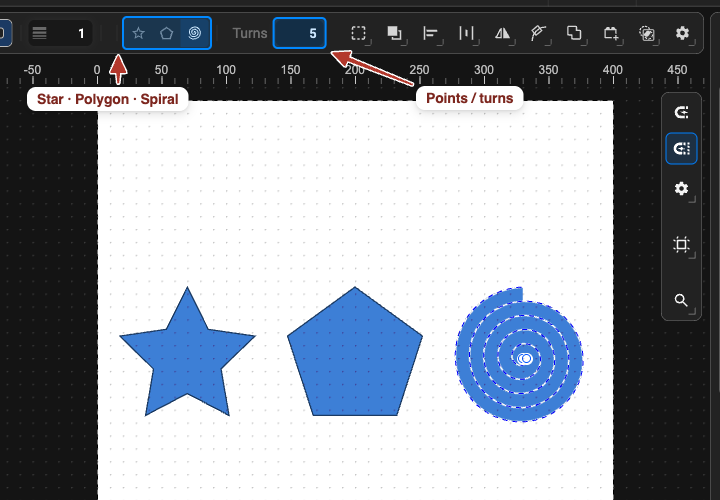
Section titled “Shape Presets (Stars, Polygons, Spirals)”Press W and pick the sub-type in the toolbar — Star, Polygon or Spiral — then drag
on the canvas. Shift snaps the rotation to 30° steps, so a star points exactly where you
want. Each preset has one geometry setting, Points Count, in the Properties panel:
| Preset | Points Count means | Examples |
|---|---|---|
| Star | number of points (spikes) | 5 = classic star, 3 = triangle star |
| Polygon | number of sides | 3 = triangle, 6 = hexagon |
| Spiral | number of turns | more turns = a longer, denser spiral |
Images
Section titled “Images”Raster images (PNG, JPEG, WebP, GIF) are objects too. Drop an image file on the canvas, choose File › Import, or paste a copied image (Edit › Paste); it becomes an image layer you can move, scale, rotate, mask, animate and place inside groups like any shape. See Import files for the ways in.
The Image section of the Properties panel shows the image’s Href (an embedded
data: image or a linked URL), its Bounds (position and size) and Aspect: unchecked, the
image stretches to its bounds; checked, it keeps its ratio with an X / Y alignment and
meet (fit inside) or slice (fill and crop).
Note: an image stays a bitmap — it does not get sharper when scaled up. For vector output, redraw it with the Pen tool.
Next
- Style what you drew: Color.
- Reshape it: Edit paths.
- Move, align, arrange: Edit objects.