Animation Techniques
Position, scale and opacity get you far, but the memorable animations use the special ones. Each recipe below says what to select, which property to keyframe, and what to watch out for. They all build on Keyframes and Easing.
Motion Along a Path
Section titled “Motion Along a Path”An object that follows a route — a car on a road, a plane on a dotted arc, a dot travelling along a chart line.
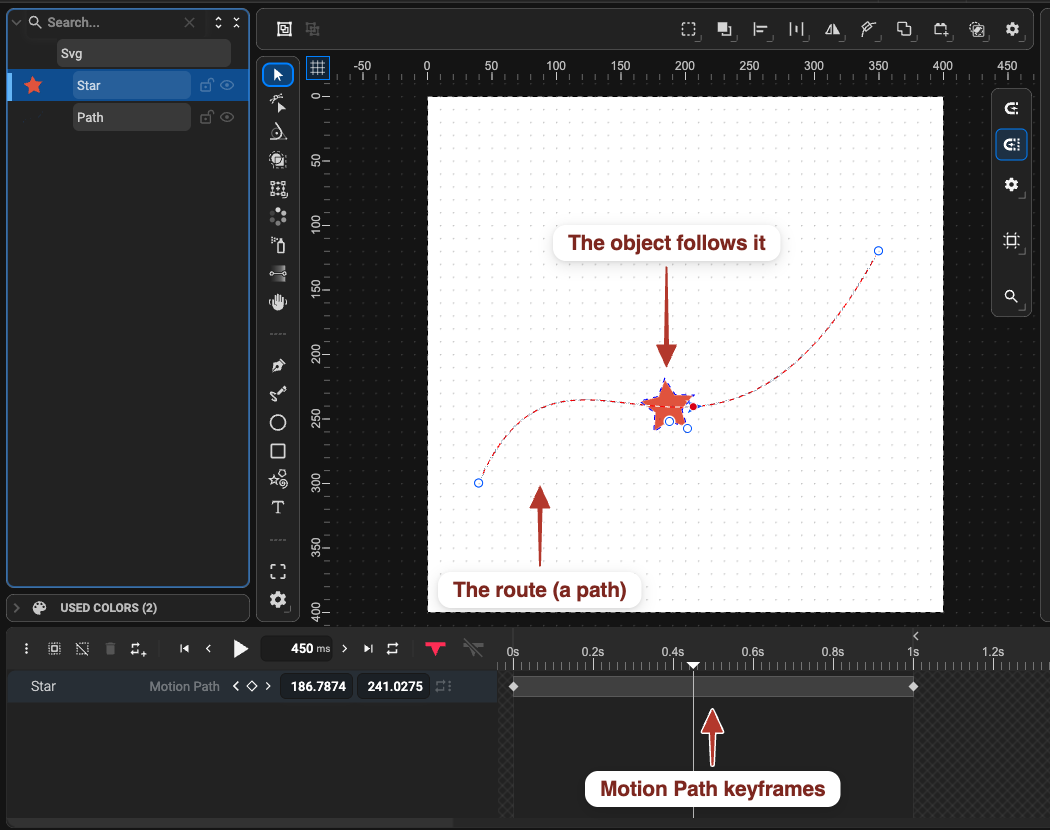
- Draw the route with the Pen tool and put it below the moving object in the Object Tree.
- Select both and click Move Element Along Path (toolbar, or the Path section).
- The object’s Position now means distance along the path: keyframe it from the start to the end, and add easing.
Tips: hide the route by giving it no stroke (it still works as a guide); reshape it later with Edit motion path; Reverse Path flips the direction of travel. Setup details: Move along path.
Path Morphing
Section titled “Path Morphing”Shapes can change shape over time: a logo that morphs into another, an icon that transitions between states, a blob that breathes. The path’s nodes are animated individually.
- Select the path and press
N(Node tool). Convert primitive shapes first (Path › Object to Path). - Pin the current shape (
Alt + A) at the starting time. - Move the playhead, then drag nodes and handles into the new shape. A keyframe is created on the path shape.
- Repeat for further states; tune the segments’ easing in the Easing Function panel.
Keep the node count the same between keyframes — each node is interpolated with its partner. Adding or removing nodes after you started animating breaks the morph. Path morphing is not available in the CSS-only SVG flavour (use JSON or SVG + JS).
Trim Stroke (Draw-on)
Section titled “Trim Stroke (Draw-on)”A line that draws itself — signatures, handwriting, diagrams, loaders.
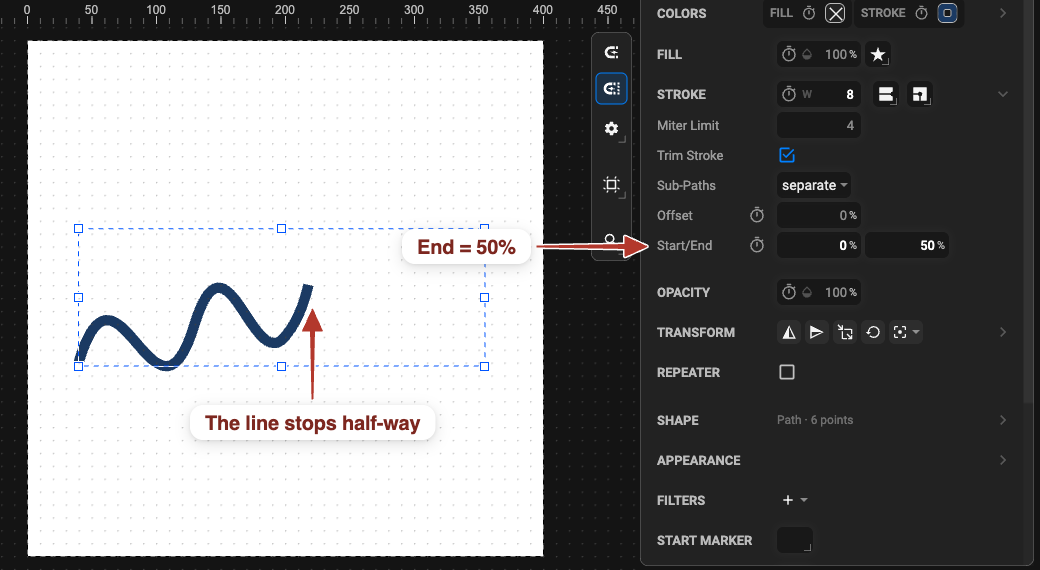
- Select the path; make sure it has a stroke and no fill (for handwriting, use round caps).
- In the Stroke section tick Trim Stroke Effect.
- Keyframe End from
0 %to100 %. The stroke appears along the path.
Variations: keyframe Start from 0 % to 100 % after the draw-on to erase it again; animate Offset with Start / End at, say, 0 / 20 % for a dash that travels around a ring (a loading spinner); with a Dash Array, use Trim All as One to trim the dashes as one stroke. Field reference: Stroke › Trim stroke.
Text Along a Path
Section titled “Text Along a Path”Text that flows around a circle, along a wave, or slides along a curve.
- Put the text on the path (Text along path).
- Keyframe Offset in the Text Path section to move the text along the curve; for a full circle, 0 → 100 % makes it orbit once.
- Animate the path’s nodes as well (Node tool + auto-pin) and the text follows the moving curve.
Use Use Glyphs or outlines if the font must not depend on the viewer’s machine.
Color and Gradient Animation
Section titled “Color and Gradient Animation”Any colour with a clock icon animates: fill, stroke, opacity — and gradient stops and gradient geometry.
- Colour change — switch on the clock next to the fill (Colors section), set a colour at each keyframe. The editor interpolates through the colour space, so red → blue passes through purple; add an in-between keyframe if you want a different route.
- Gradient sweep — animate a linear gradient’s Position or Rotation for a shimmer, or a stop’s colour for a pulsing glow. Keep the number of stops constant between keyframes.
- Fade — prefer the object’s Opacity (Appearance section) over the colour’s alpha when the whole object should fade; use fill / stroke opacity to fade only one of them.
Mask Reveal
Section titled “Mask Reveal”Show content by moving a mask instead of the content itself — wipes, spotlights, growing circles.
- Make the mask (Masks) — a rectangle for a wipe, a circle for a spotlight.
- Select the mask shape and keyframe its Position, Scale or shape.
The content stays still; only the visible window moves. Combine with a trim-stroke path used as a mask for an “ink filling in” effect.
Filter Animation
Section titled “Filter Animation”Numeric filter settings are animatable: a blur that sharpens as an object arrives, a drop shadow whose offset grows as the object lifts, a saturation that fades to grey. Switch the clock next to the setting in the filter’s entry (Filters). Filters are not available in the CSS-only SVG flavour and only partly in Lottie — check the export preview.
Instances and Clones with Their Own Timing
Section titled “Instances and Clones with Their Own Timing”A symbol instance or a clone plays the source’s animation, but can shift it: Start delays it, Stretch speeds it up or slows it down, Crop Time clips it to the instance’s own range. Ten instances of one waving flag, each with a different Start, become a stadium wave with a single animated source.
Next
- Repeat any of these forever: Loop animation.
- Make them react to the page: Playback and triggers · Scroll-driven animation.